How to Plan a Science Fair Project: A Week-by-Week Timeline
An 8-week science fair timeline that actually fits around school: what to do each week, the mistakes that sink projects, and a 4-week plan if you’re short on time.
Most science fair projects don’t go wrong at the fair. They go wrong in week two, when the experiment hasn’t started yet, or the night before, when the display board is still blank and the data has a hole in it.
The fix is almost always the same: a simple plan, started early, with each week doing one job.
Below is an 8-week timeline that works for most middle school and high school fairs, plus the mistakes that sink projects and a squeezed 4-week version if your fair is coming up fast. It works whether you’re a student, a parent helping out, or a teacher handing out a schedule.
Before week 1: three things to check
Spend 20 minutes on these first. They decide how much time you really have.
- The fair date and every deadline before it. Registration, project proposals, teacher check-ins and the date boards are due all come before the fair itself. Write them all down, then plan backward from the earliest one, not from fair day.
- The rules. Fairs set limits on board size, what you can display, and which kinds of projects are allowed. Reading them now is much easier than rebuilding a board later.
- Whether your project needs approval first. Many fairs, especially those that follow the international science fair rules, require signed forms before you start any experiment involving people, animals, microorganisms or hazardous materials. If your idea touches any of those, ask your teacher in week 1, because approval can take time.
Then count backward from your first deadline. If you have eight weeks or more, use the full timeline below. If you have less, skip to the 4-week version at the end.
The 8-week science fair timeline
Each week has one job. If a week runs over, the next one gets shorter, but don’t skip any.
Week 1: Pick a topic you can actually test. Choose something you’re curious about, then narrow it to one question you can answer with measurements. “Do plants like music?” is hard to test. “Does playing music for 2 hours a day change how tall bean plants grow in 3 weeks?” can be measured. Check that you can get the materials and that the experiment fits in about two weeks.
Week 2: Research and write your hypothesis. Read a few reliable sources about your topic and take notes with links, since you’ll need them for your report. Then write your hypothesis as a prediction you can check: “If ___, then ___, because ___.” Start a project notebook this week and date every entry.
Week 3: Design the experiment. Decide your three variables: what you change, what you measure, and what you keep the same. Write a step-by-step procedure someone else could follow. Make a materials list and buy or borrow everything now.
Week 4: Run a quick test first. Do a small practice run of your experiment before the real one. This is where you find out the scale isn’t accurate enough, the timer is awkward, or one step takes three times longer than expected. Fix the procedure now; it’s much cheaper than finding out in week 6.
Weeks 5–6: Run the experiment. Do it for real, and repeat it. Three or more trials make your results far more convincing than one. Record every measurement in your notebook the moment you take it, including anything that went wrong. Take photos as you go; you’ll want them for the board.
Week 7: Analyze and write up. Put your data in a table, then make one or two clear graphs. Compare the results to your hypothesis. It’s fine if it was wrong, as long as you explain what happened. Write your report or abstract, plus a short section on what you’d change next time.
Week 8: Build the board and practice. Lay out the board in the order a judge will read it: question, hypothesis, method, results, conclusion. Use big titles, your graphs and a few photos, and keep the text short. Then practice explaining your project out loud in about two minutes, and have someone ask you questions.
Mistakes that sink science fair projects
- Starting the experiment too late. Plants need weeks to grow, and tests sometimes need to be redone. If your experiment hasn’t started by the halfway point, everything after it gets squeezed.
- Only one trial. A single result could be luck. Judges almost always ask how many times you ran it.
- Changing more than one thing at a time. If you change the music and the amount of water, you can’t tell which one made the difference.
- Writing notes from memory later. Record measurements as you take them, with the date. A real notebook is often part of what judges look at.
- Saving the board for the last night. Board work always takes longer than expected. Start the layout in week 7.
- Not practicing the explanation. Many students know their project well but freeze when a judge asks a simple question. Practicing out loud once or twice makes a big difference.
Short on time? A 4-week version
If the fair is a month away, squeeze two weeks into each one. Choose an experiment that gives results in days, not weeks.
- Week 1: Pick a testable question, do quick research, write your hypothesis and design the experiment. Get your materials by the end of the week.
- Week 2: Do a short test run, then start the real experiment right away.
- Week 3: Finish your trials and analyze the data as it comes in. Start the graphs.
- Week 4: Write up the conclusion, build the board and practice your explanation.
Planning it in Flowboard
A paper timeline works, but it’s easy to lose and hard to update when a week slips. In Flowboard, you can lay out the whole project on one board:
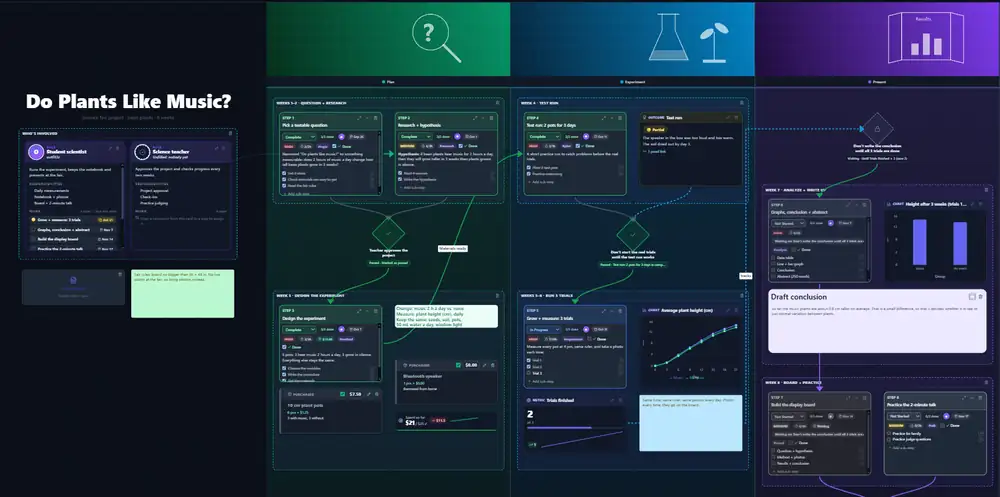
- Each week becomes a step with a due date, so the timeline and calendar build themselves (project timelines).
- Research notes, photos and data sit on the step they belong to, so by week 7 most of your report material is already in one place.
- Gates keep you honest. “Run the experiment” stays locked until the materials and test run are done (gates).
- Parents and teachers can follow along on the same board instead of asking how it’s going.
If you like seeing a bigger project laid out this way, read how we planned four years of NASA hardware projects in What 4 Years of NASA HUNCH Taught Us About Planning Engineering Projects. Or try Flowboard free for 7 days and set up your science fair timeline in a few minutes.